Showing posts with label Layout Secrets Exposed. Show all posts

Purdy Blog Hints Take Two

I did a mock up of what I explained yesterday.  The way I did mine (on all blogs) was I made a "spare blog" then I deleted them.  I do this so I can actually see my tweaks as I do them and not mess up my "real" blog.  Blogger lets you have as many blogs as you want, so why not make one just for the tweaking.  Well, I did and it worked out ok.  Then all I did was copy and paste what I tweaked.  *BE CAREFUL BECAUSE IF YOU JUST COPY THE WHOLE THING FROM AN EMPTY BLOG YOU COULD LOSE YOUR WIDGETS*  So only copy what you tweak.  Like width, height, backgrounds, etc.  The template you just download straight from the source.  What I'm talking about is the adjustments of the template.


So this is what I did.  I downloaded the template to the spare and did all the tweaks, background url's, width, height, added signature, added new font for headings (KevinandAmanda (dot) com), etc.  Everything.  And played with it until I was happy.  Then, I downloaded the untouched template (from the source) to my real blog and went back and forth, from the spare blog to the real blog edit html, copying and pasting until all was done.

Another hint is when your tweaking, do one thing at a time.  Like just width of just main wrapper. Tweak it until you get it right.  Then save.  If you mess up its easier to "clear all edits"  so you know your starting fresh.  Its a lot of mumbo jumbo and you dont want to get lost in it.  

So the mock up I did was from all the stuff I showed you yesterday.  I left it on my spare blogs at chickenista-backgrounds and chickenista-backgrounds2  You can go take a look at how you take what I talked about and put into action. ♥

How to Purdy Up Your Blog For Free

I thought I would do another post on how to make your blog a lil bit purdy. When I first started blogging I was oh so jealous of those neato splendito pro bloggers. They had the good stuff, Im telling you! I searched and searched for a new face for my blog. I found a lot of cute layouts! For free!! Yup like the cutest blog on the block (dot) com. Which I used and loved. Loved until I saw it on another blog. Who did a way better job than me personalizing it! So, that's a down fall of the freebies. Its not yours and its not unique. You can try and personalize it, but still. However, they are simple. You copy and paste nothing can go wrong with them.


Anywhosit.... I knew when I came back I was gonna redo the whole enchilada. I did a new template and layout. I wanted a more "me" blog.

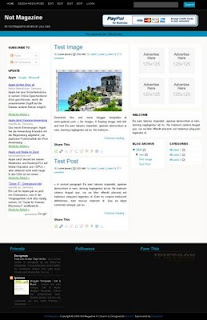
When I went out looking for a new template I knew I wanted ad space, 4 columns, and room on the bottom and I found Ipietoon's Not Magazine template.
*free download btw*

layout tips
*click to enlarge all pictures*

Thats how it looked when I got it.  Looks nothing like my page right.  That's because I "tweaked" it. 

And heres how.


So you know there are tons of digital scrapbook programs and sites out there.  I happen to love scrapblog (dot) com.   Some stuff costs, but there is plenty of freebies.  Cute freebies.  I haven't spent a penny on my site.

They have tons of fonts heres  a few examples:

layout tips


Find a theme you love and you can do everything there.

layout tipslayout tipslayout tips
After you make these simply download to your computer and use something like photobucket to crop and resize. "Save a copy" so you can cut out each one.  Use their code to place on your blog.

For backgrounds
Simple-

layout tipslayout tipslayout tips

Same thing download it and then upload through photobucket. Only this time you will only use the direct link.

and you put it in your edit html part where you see "body {" you would put in this under it:

background:$bgcolor;background-image:url('direct link');
        background-position: center;
        background-repeat:yes-repeat;

Its the same for your wrappers, or side columns whatever their named in your template.  


Now if you want just color behind like your posts you would do this instead:

background:#fff;


The fff after the # is the color you want.


Ok for clear like at the bottom of my blog you would do 


background-color:transparent;

Another thing is my banner, it was wider than what the template was.  So if you dont mess with it, your banner will be cut off. 

#header-wrapper{
    width: 960px;
        height:350px;
    font-size: 11px;
    margin: 0 auto 0;
    padding: 0;
    overflow: hidden;
        color:#000000;


Just look for the width and height  and change them a little.  Always preview before you save anything. 

Here some banners you could do at scrapblog:

layout tipslayout tipslayout tips


Now I say back up your template.  You dont want to have an oopsie and hate me. 

Photobucket is a cool place cause you can crop and resize and its free.  You get a huge amount of space you can use.

To add things like your signature at the bottom of your post I used my live signature (dot) com.
 You put that code above this:


< div class =' post-footer '>


For scrolling boxes for awards, buttons etc you would put this before the button code


If you wanna customize your place and make it more you, you dont need to be a pro and you dont need to spend butt loads of money.  Just takes time.  Patience oh yes lots of that.  I screwed up mine a couple of times.  But for now Im happy with it.  Next time I want to revamp, it'll go a lot smoother.


I hope I helped.  ☺

If you have neat ideas I love to hear them. 

If You Wanna Know I'll Tell Ya! Layout Secrets Exposed!!

So I changed my layout recently, and it was really time consuming so if anyone wants to benifit from my experience heres how I got it. FREE!!!!!

The 3 column thing was from TCBOTB. You go there and click on "blog secrets" you'll find all kinds of neat tricks. Their easy step by step instructions made is so easy breezy.

The signature was from photobucket. I saved a picuture from my layout to the computer and uploaded it to photobucket. There I cropped it so I had matching background. Enter text into it and tada signature. Now where to place it, I got that from TCBOTB too. It's in layout, edit html, then expand widgets (check that box) and press ctrl f (for find) then enter
and put it right below it.

Banner I did from banner sketch. Again I uploaded the cropped background from my computer so it will blend and used their generator. Easy. You add that at layout, page elements, header, upload, click on instead of and save!

Blog button I used photobucket again. When I got the html code I just changed the first set of photo bucket url to mine blog url. So it's clickable to your site. But to display just the words so others could take my button that was soooooo frustrating!!! I couldn't find it anywhere on the web, I was really going crazy. But finally at about 4am this morning I found it. I dang near woke everyone up I was so thrilled!! I found it at www.w3schools.com/tags. You go to http://www.w3schools.com/tags/att_textarea_readonly.asp and hit try it yourself, erase the text they have in leaving the top part, paste in your button info and hit eneter. If it comes out right then just copy that whole part on the left. Then you go to your add gadget, add html, and paste your "read only" button info. (How easy huh "duh read only")

The scrolling text at the top was done by going to layout again, edit html, expand widgets, ctrl f enter this
and just under it you place

You can put anything you want in the text area.

These are really neat tricks, but I do recommend backing up your layout first before you play with it!! Very important!! You can never be too careful.

It seemed everyone was really backed up with layout designs and I'm too impatient to wait for someone to do it for me, so I decided to learn on my own. I saved a lot of money too.

Have fun and let me know if it helped you please.

Also a HUGE THANK YOU TO THOSE SITES. Keeping a free site must be difficult so if you use them and are fortunate enough to donate a little, it goes along way!!!

up